Some people think product photography is one of the easiest things out there. However, it is not so. There are various things that you need to keep in mind such as your background, lights for photography, color matching, camera settings and a whole host of other things. These are all important things to keep in mind.
So in this particular guide we will show how to get the best photography lighting set up and well also give you some tips along the way.
Couple of things to keep in mind
These are the couple of things that you need to keep in mind while creating your images:
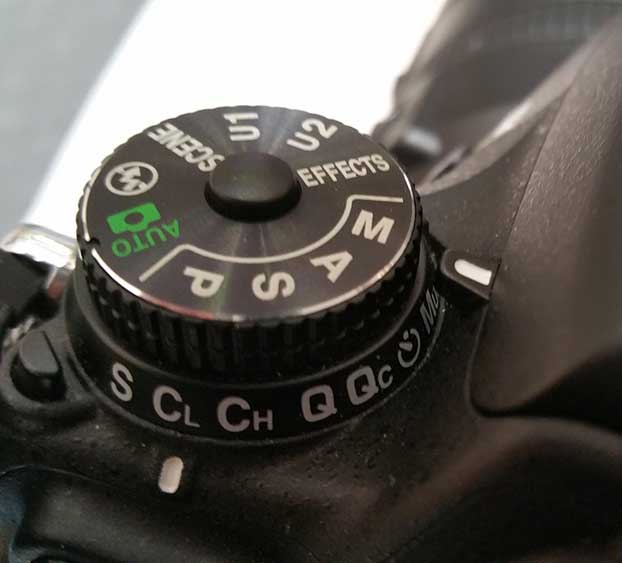
- Manual mode on your camera will give you the most control over your exposure.

- The more time you take creating a perfect shot in camera means less time in post-production. This in-turn gives you the best-looking image to sell your product online or in print.
- Establish your lighting style. Whether you are using studio lights or natural light, consistency is key.
- Test your shot with different camera settings in order to get the best exposure for your style and product. You need to make sure that you have set proper ISO, aperture, and the speed of the shutter.
- Use a tripod for super crisp images.
Why you should pay attention to photography lighting?
Some people do not consider lighting at all. However, if you are using images to sell your products online, you absolutely should. Here are few reasons why:
- Better picture= better sales. In this digital world, people will first look at the picture rather than looking at the specifications. This is why your picture should be amazing. Using the correct lighting for photography will automatically make your picture better.
- A Google shop listing. A Google shop listing will help you add your product in the Google search. Thereafter, whenever someone searches for the product and hits the shop button, they will be able to see your product. Google only approves products with HD pictures of good quality. Another reason to use a great lighting set up for photography if you want to list your product in a Google Shopping listing.
- Further, you will need better pictures if you the photos as a part of your branding strategy.
- Last but not the least, the reason why you should set proper phototherapy light is because of your post production procedure. When your images reach the final stages of processing, you’ll want to hand them off to a team of professionals who can put that final polish on them. Retouching images is a difficult task to take on. Why not hand it off to pro’s like the ones at Pixel Laundry so that you can work on your business and not in it.
Types of lights for photography
There are various lights for photography which you can go with. Depending on where you are shooting your photos, you might need different types of light.
Natural light
You can surely use natural lights wherever possible. However, it can prove difficult depending on your access to natural light. Your shooting room may not have access to a strong and consistent source of bright and clear light. However, if you do you may be able to use light that is coming in from a window to shoot your photos. As mentioned, as the light changes throughout the day, so will the strength and color of your light which can prove to be difficult to use if you are shooting throughout several hours of the day. But if you are shooting only a small batch of a images and get the entire shoot done in a matter of minutes or a few hours, natural lighting may serve you well.
Also, you should keep in mind that you don’t need direct lights to use this method. Instead, you can use indirect lighting by bouncing in natural lights with white card stock boards or reflectors.
Further, you can use both studio lighting and the natural light together to create a unique look to the images.
If it is not possible to get the natural lighting in your place, the best thing you can do is get some studio lighting. You will need to close off the room from other light sources in order to get the best effects of studio lights, but this allows you a complete level of consistent control of your lighting for reliable results on every image.
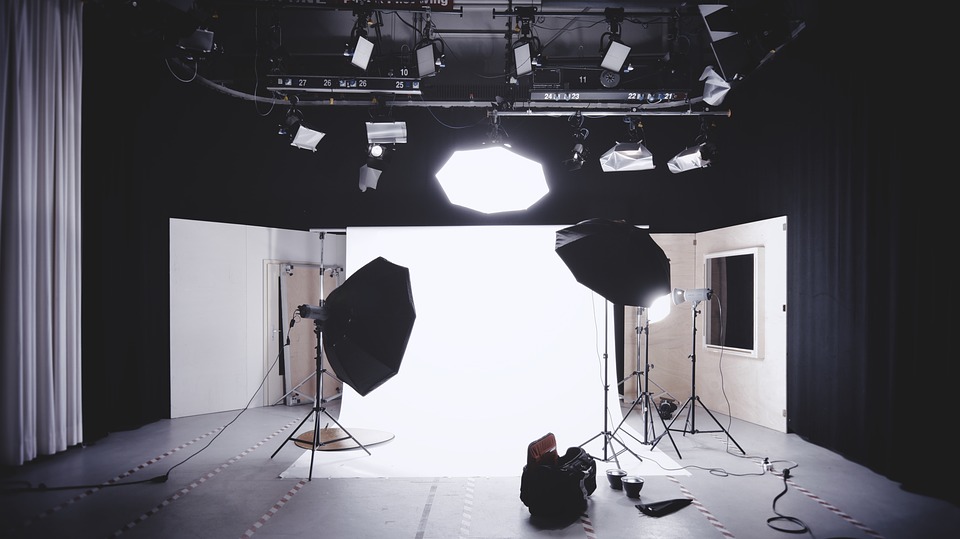
Studio light
There are various types of studio lights which you can go for. Each of the lights will help you in a different way so depending on the need and the environment of your setup, you’ll choose the lighting that best suits your scenario.
Types of Studio Lighting
Let’s talk about the different types of studio lights there are and what each can be used for.
There are mainly three types of studio lights which you can go with
- Speed lights
- Mono-lights
- Continuous lights
Speed lights: These are the lights which mount somewhere like the hot-shoe of your camera for example. You can mount them on your camera or you can use a stand to fit these somewhere else. There are meter modes that you need to set which tells the light when and how bright to flash.
Mono-lights: These are basically large strobe lights that fully encompass all of the controls in one place mechanical unit. They can be triggered with a sync cord that attaches them directly to the camera, a transceiver that sends a radio signal to them from the camera or an internal radio slave which tells them to fire when a sensor built inside of them sees another flash go off.
Continuous lighting: Continuous lighting is the type of lighting that stays on at a high level the entire time it is being used. This is the type of lighting that is used in film-making and can also be referred to as “hot-lights”. Since the light is constantly on, the lighting mechanisms tends to get very hot and as a result coined the term. With the advent of LED lighting however, hot lights are being phased out since they require a large energy output and get very hot which can create a dangerous working environment.
How to set up studio lighting?
Now that you know about studio lights, the next thing we’ll talk about is how to set up studio lighting. But before we jump into the whole light placement thing, you should know the main three fundamentals of the studio lights. Whenever you shooting product photos, you should keep these three things in your mind so you can get approved for Google Shopping listings as well.
Fundamentals of lighting
There are three lights that you need to setup. This particular setup is known as 3-point lightings.
- Key lights are also known as the primary lights or direct lights.
- Fill lights fill in the dark shadows created by the key light.
- Rim lights or also known as backlight or hair light create separation of a subject from the background.
Let’s take a look at all the three in detail.
3-point lighting
Key light: Key light is the direct light that will point directly to the product. Generally, this kind of light is placed at an angle of 45 degrees on either side of the camera (left or right). This helps to see the product more clearly. It is the main source of light and that is the reason why it is also known as the primary light.
Fill lights: Fill light are the studio lights which will fill up the shadow and the parts which are not covered by the key light. Fill lights should not be as bright as the key lights as it tends to visually flatten out your subject. What you are trying to achieve is 3 dimensions from a 2 dimensional medium so we need the lighting to not be the same from every source. Your fill light will need to be relatively low in comparison to your key light. You will set the fill light on the opposite side of the key light. For instance, if you kept the key light on the left side, you can set the fill lights on the right with low intensity.
Rim lights: The next light is known as rim light or backlight. As the name says, it should be set on the back of the product. It will help you to see the edge of the product more clearly by separating it from the background. Further, it will also enhance the little details of the product. Not to mention, it will remove the back shadow of the product (if any). You need to keep this on the same side (left or right) where you kept the key light.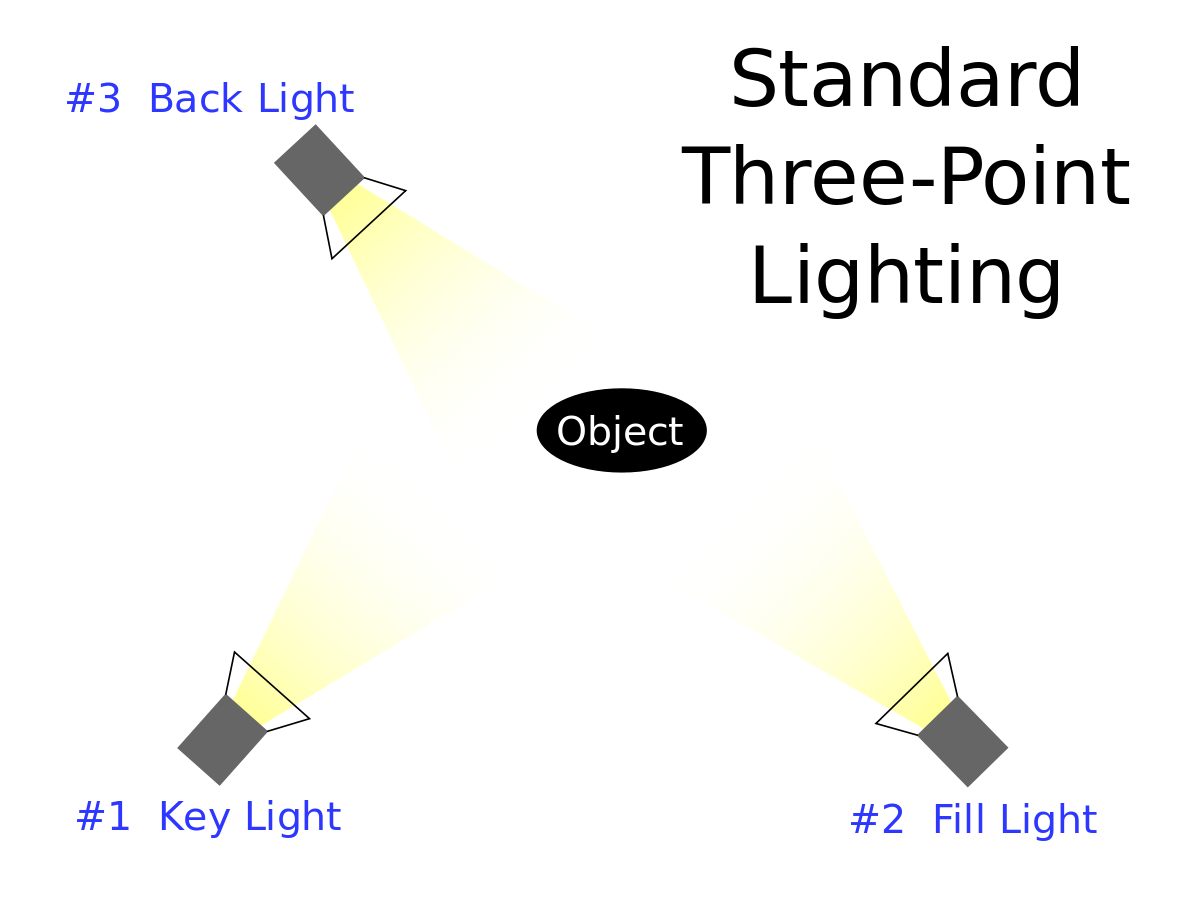
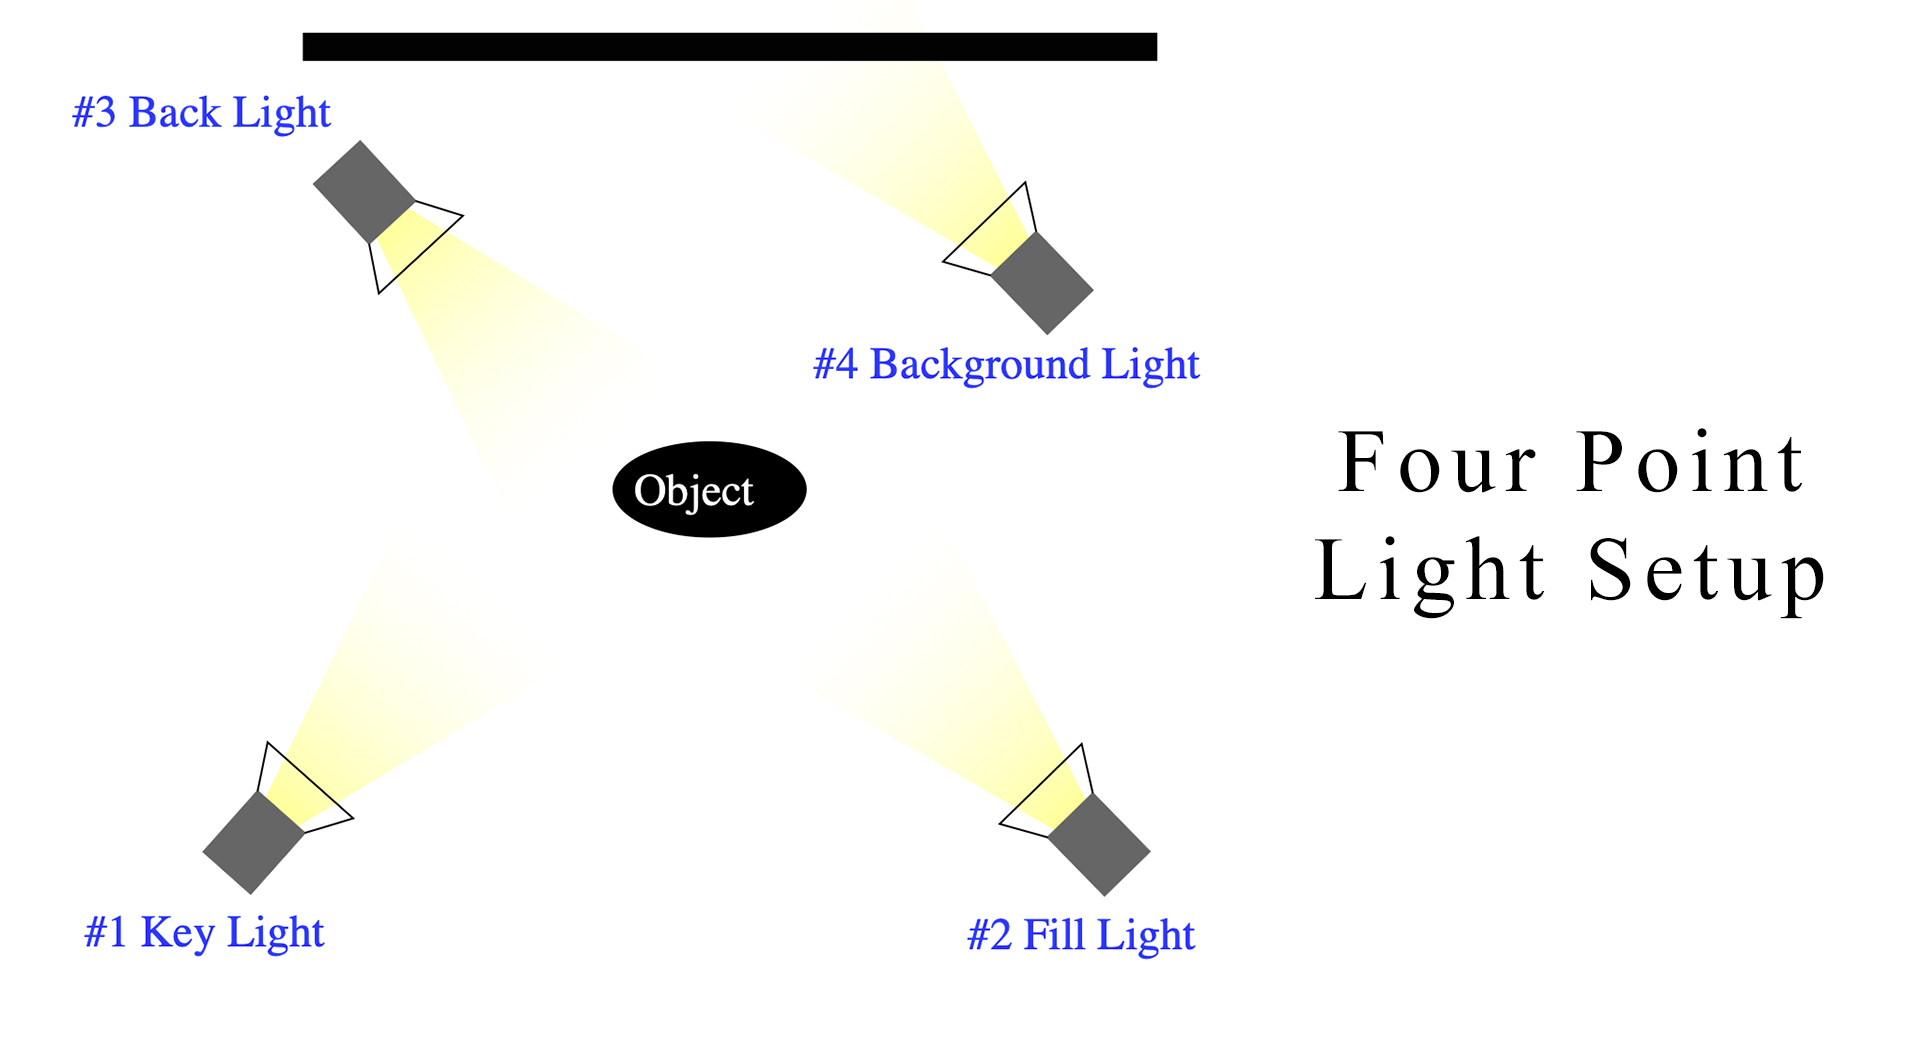
4-point lighting
Further, if you want to do something extra. You can add one extra light. The light is known as the ground light or the background light. Just like the rim light, this light should also be placed on the back of the product. The only difference is that this light should point to the background of the wall. If you have kept the white background as the wall, you can use the extra light to make it clearer or brighter. The background light can be on the ground or hung high and out of the images and should point to the background and not the product itself.
Step by Step light placement
 Step by Step light placement
Most of you might have already got the idea of how exactly you will have to do the light placement. However, if you haven’t got, here is the step by step guide.
- First of all, you need to set the camera exactly in the middle of the photo.
- Make sure you keep the photo at a decent distance from the camera and it has a white background
- Next, you need to set the key light on either side of the camera. Let’s make your simpler and choose right. Keep the key light on the left side with a 45-degree angle.
- The next thing you need is the fill light. Keep the fill light on the right. You need to make this light low. Do not keep the fill light on the same angle, keep it a little bit far where the key light is fading.
- Now, go to the behind the product and keep the rim light on the left side. Make sure the rim light is facing the product. You don’t need to maintain the same angle as the key light. Instead, keep it near to the product.
- If you are going for the 4-point setup, you need to set up the 4th light (background light) on the right side behind the product. Make sure that the background light is facing the background and is low on the ground.
That’s pretty much it. You can shoot a couple of test shots and adjust the studio lighting accordingly.
Finalize your image
Now that you have gotten your perfect shot, it is time to turn off the studio lights and get into the finalization of the image.
This is the place where the image is retouched to make it perfect. This is is done in photo editing tools such as Photoshop. Retouching is the process where an editor will enhance the small details and make the product even more attractive.
No matter how much attention you pay when shooting the photo or how much perfectly you set up the studio lights, your photo will need a final pass in a retouching phase if you want optimal results. This will help you in getting a Google shopping listing approved so you can get better sales.
Instead of doing this on your own, we recommend that you use Pixel Laundry. Pixel Laundry is a Clipping and Retouching Service provider for online and traditional retailers. We have 20+ years of experience in e-commerce photographer and editing hence provide the best quality retouching service. The process is simple and cost effective. This way, you can focus on your business and leave the retouching to a pro.
Final words
Your lighting can be as unique as your products but it doesn’t have to be complicated to make great images and have great sales. You can tweak the setup of the studio lighting placement as per your needs and requirements. Trying new things will give the opportunity to create a unique look that can help you stand out online.
Once you get your images to a place where you are ready to move on to the next phase, contact Pixel Laundry for retouching services so we can put a final polish on the images to get them to the next level. We hope this little guide helps you and if you have any other questions we’d love to help. Please reach out at any time.